X-Raying closed modules and IC’s
I think adding cellular connectivity to projects is super neat, but the modules available up until recently have been a bit cost prohibitive. For a few years I’ve considered ordering a Spreadtrum SM5100B Arduino shield to play with, but that’s ~$100 which seems ridiculous to me when you consider that you can buy dual-SIM cellphones from Chinese suppliers for $20/piece. One day a few months ago I noticed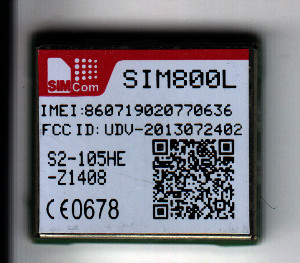 that Adafruit was selling a cellular board which uses the SIMCOM SIM800L module. After some searching I found I could order SIM800L’s by the reel from DealExtreme for $8 each. The modules are designed to be easily integrated into projects; they have solder pads for a microphone, keypad, speaker, and a serial connection. With the serial connection you can issue commands to dial and answer voice calls, but can also send data via GPRS. The module has an internally implemented TCP/IP stack with built-in FTP and HTTP protocol negotiation so your host device doesn’t have to work very hard to send raw data back and forth. At $8 this module is pretty hard to turn down, so I ordered one. Three weeks later a little brown envelope arrived from China.
The module was small, about two centimeters on a side. The solder pads are located on the reverse in a grid pattern. I had planned to hook it up to an arduino and throw commands at it, but quickly began to wonder what was inside the RF can. With a TCP/IP stack and the various other features that are advertised, this module probably has some serious silicon under the hood. I didn’t want to wreck the chip, but I did want to know what was inside. Luckily, a fellow Hacklab member’s father happens to be a dentist with access to an X-Ray machine and a soft-spot for hackers. Time for some radiological investigation!
The member in question took my module, and a few days later returned the module along with a film X-Ray negative and some digital X-Ray prints, all of varying qualities.

The first, mostly unfiltered X-Ray of the SIM800L
The first set I looked at were the digital X-Rays. The first two printouts that I had were mostly raw data from the digital X-Ray imager with little post-processing. You can definitely make out components on the first prints, but there’s a lot of noise. One interesting part of this experiment was that the member who had the X-Rays done for me discovered that the printed versions were of a much worse resolution than the ones displayed on-screen in the software provided by the X-Ray vendor. We’re not sure why this is, but at least one person speculated it might be some sort of incentive to buy licenses for the X-Ray software rather than sharing the images around in a more open format.

A very cleaned up digital X-Ray
After a bit of cleaning up, the above image begins to look like the one on the right, which is much more useful. This really interested me; there’s clearly something taking up most of the package real-estate on the right side. I guessed that this was probably some sort of chip soldered in the package via Ball Grid Array (BGA). There’s also what looks like multiple components surrounded by a dotted line (solder joints from another RF can?) on the upper-left side. The image quality is definitely useful, but a little limited.

X-Ray negative on the Hacklab light table.
I inspected the film negative next. Hacklab has a fully-operational chemical darkroom with a light-table, which is how I got the picture on the left. As you can see, the negative itself is quite small. If you look at the negative at full resolution, you’ll notice a significant number of dots with rings around them all over the place. At first I thought this was due to some dust or other foreign substance in the developer solution, but a fellow Hacklab member with experience in circuit board design suggested that they’re likely vias which connect the various layers of the board together. Super cool!

Final photographic enlargement of SIMCOM SIM800L
Another Hacklabber decided to stick the negative into the photographic enlarger in the dark room, and printed an 8 1/2″ by 11″ positive, which came out looking very nice. I scanned the print, and the picture on the right is the result. The resolution is quite good, and the major components are all visible. The print was unfortunately made with the negative upside-down, but now that I’ve scanned it it can be flipped in GIMP or another image editing tool. If you squint, you can make out traces on the board as well. I bet the contrast of the traces could be improved by making another X-Ray with different exposure values.
After viewing all of these X-Rays, my curiosity got the best of me and I decided to remove the RF-can with a rotary tool and an abrasive cut-off disk. The following pictures are potato quality because they were taken with a cheap USB microscope that was the best and only option at Hacklab at the time.

I knew that the module had to contain at least a microcontroller based on all of the features it had, but I was pretty surprised to find that it contained a full ARM SOC. Mediatek seems to specialize in SOC’s for this type of application. The SOC for this module is a Mediatek MT6260SA, which is closely related to the processor in the $12 Chinese cellphone that Bunnie Huang wrote about a few years ago. Bunnie has a write-up about this line of chips (and some more really neat X-Rays) here.

The other major chip inside the RF can is a RFMD RF7176 quad-band transmit, dual-band receive GSM/GPRS RF module. I haven’t had time to dive into the data sheet yet, but my impression is that this chip performs RF modulation/demodulation for the SOC, as well as signal amplification.
 After taking the above pictures, I was curious about the underside of the ARM SOC. The X-Rays had shown a grid of dots which I suspected was a BGA. I hit the chip with a heat-gun and pried the SOC off the board, at this point completely committed to not getting the module working ever again. That’s okay though; the teardown was fun and interesting, and I’ve paid $8 for things which aren’t half as fun as this, so my money was well spent.
Above, you can see the underside of the SOC. The pattern of dots was in fact a BGA. You can see the outlines of various traces inside of the SOC if you look carefully.
Conclusions:
It was interesting to see how closely the X-Rays matched the physical characteristics of the module. The X-Rays gave me a really good idea of what to expect before taking the RF can off; a Hacklab member who was more familiar with electronics looked at the initial X-Rays and was able to successfully identify multiple types of components without ever having to open the module. I can see how this might be useful for reverse engineering other tech.
The Hacklabber whose father performed the X-Ray for me said it cost less than a dollar for materials, so dental X-Rays seem to be a cheap method for investigating sealed modules if you know someone who is willing to donate their time. If you don’t have a friend who is a dentist, you could probably convince a random dentist to do this sort of thing but you would probably have to pay for their time. That’s a non-trivial expense, but probably better than industrial radiography places.
The dental X-Ray quality is not good enough as far as I can tell for examining very thin wire traces and internal silicon structure, so I suspect that a person wishing to get that level of detail might be looking at some expensive industrial radiography services. Still, one might be able to play with the settings of the machine to get better results; dental X-Ray machines are designed to use as little radiation as possible to minimize health risks, but aside from considerations for operator safety, one isn’t constrained to low dosage levels when X-Raying most electronics. A higher intensity beam and much less sensitive film with better granularity would improve things a lot. I suspect most machines could be configured by the operator for greater output (or even just multiple exposures), and less sensitive X-Ray films with better granularity could be used for finer detail.
This was fun. I look forward to having more stuff to X-Ray!

Recent Comments